If you are a video editor, then you must know how to mask with shape in Premiere Pro. Masking can make or break your video. You can use lots of different types of masks like in color grade or special effects. You can make a mask to hide some information that you don’t want to show in your video.
You can make a mask in Adobe Premiere Pro, which will save lots of time when editing a big project. The below tutorial will show you how you can simply add a mask in premiere pro. In the end, I will show you other situations where you can use the masks.
Let’s begin the Tutorial!
1. First Decide Which Workspace you want to use?

When you have added the video which you want you to use the mask, then go to Window and select Workspaces, and choose Editing.
After choosing the Editing workspace, you can choose the Effect Controls tab in the upper left-hand window.
2. Remove the Below Clip
When you want to create a mask in Premiere Pro, it’s similar to cutting a hole in it and making the below clip visible. It’s very fewer chances for error as you start to learn the different functions of an image mask.
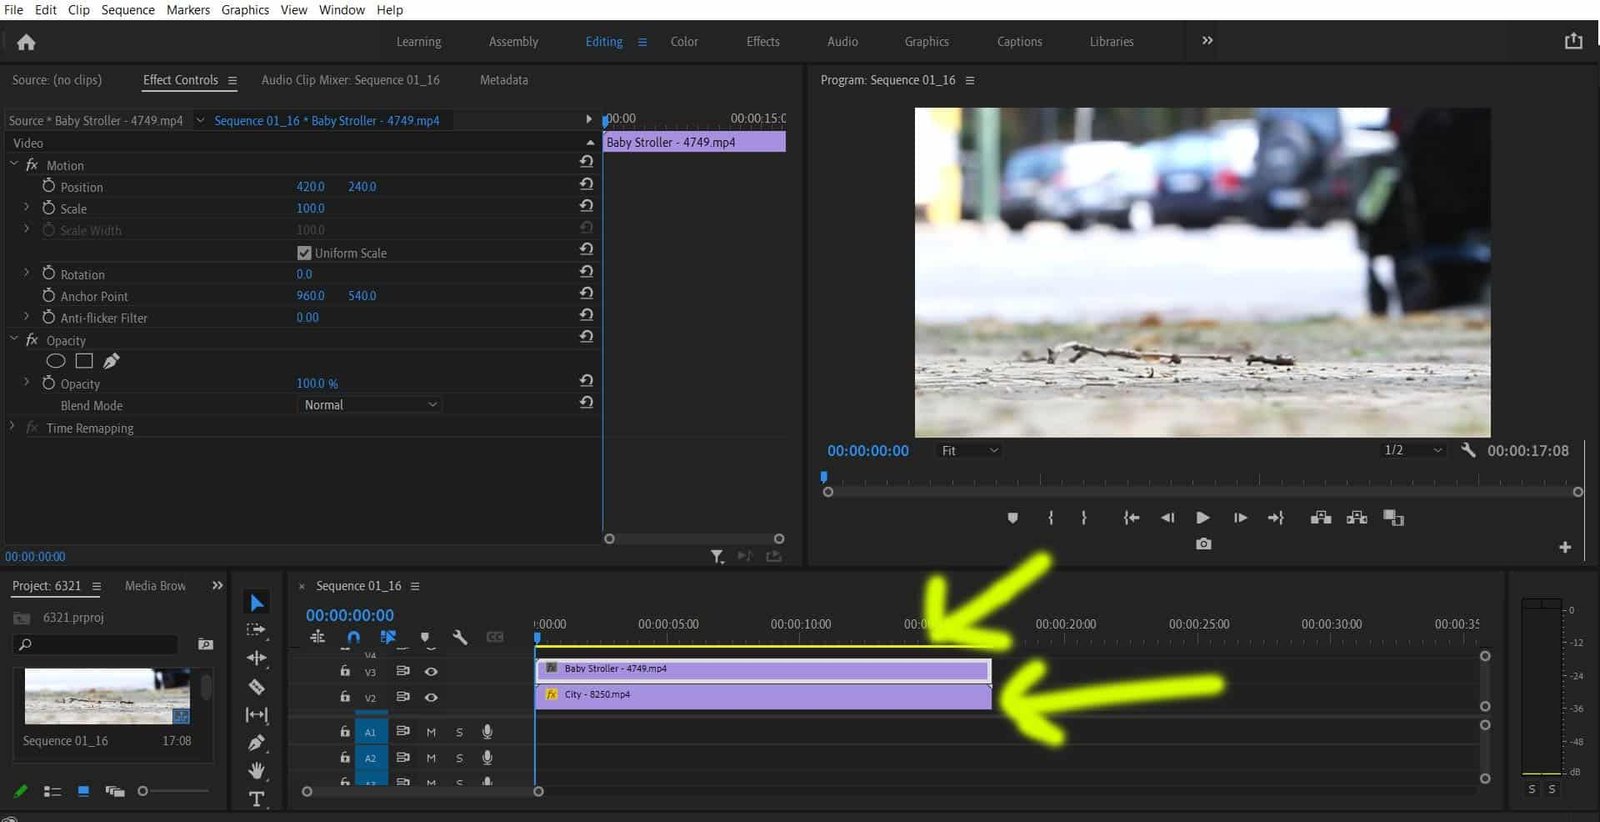
3. Highlight Your Video to Create a mask with shape in Premiere Pro
You have to see the shot that you are working on inside the Program Monitor, by highlighting the video. You make sure what you do only affects that video only.
4. Making an Opacity Mask
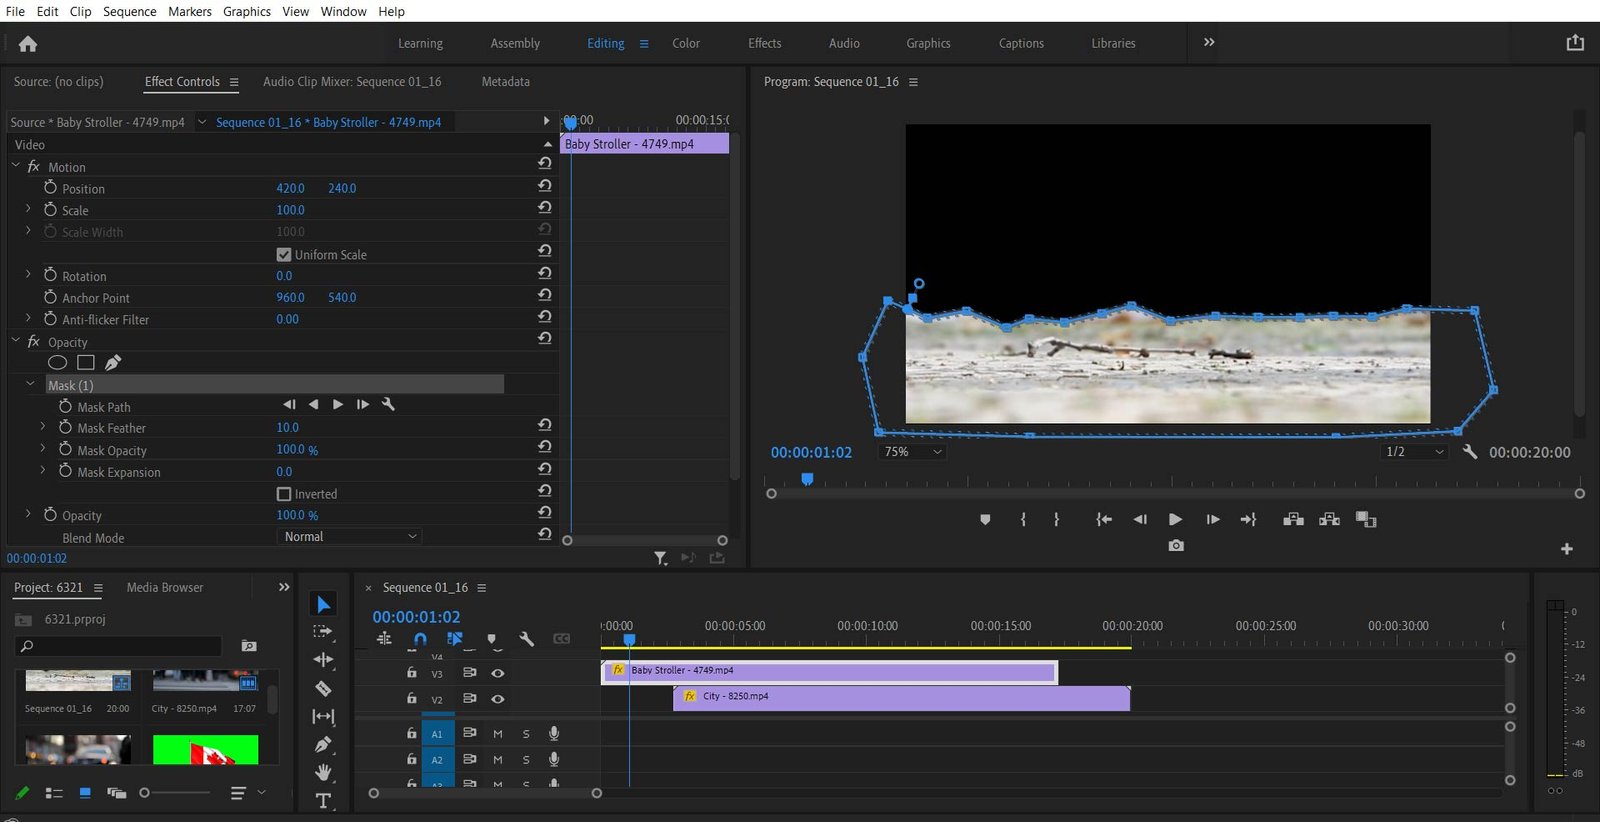
You have to select Opacity in the Effect Control panel. You can see three icons below the Opacity, the first one is an eclipse, the second one is a four-polygon mask, and the third one is a pen tool. We can create masks with these three options.
Now, click on the pen tool. Here, I’m masking the road and changing the background with another video where people are walking. Now slowly make a mask around the road. You have to reach a starting point, in the end, to close the selection and create a mask with shape in premiere pro.
5. How to Invert the Mask with shape in Premiere Pro.
Just Click the check box below the Mask Expansion, it will make the mask black and allows you to see the original video around it.
You can also manipulate the edge feathering, changing the mask size and placement of the mask, now we are going to learn how to blend a mask in premiere pro.
You have to select Mask 1 to show you the blue outline on the selected area.
6. Now Place the Second Clip Below the Masked video. 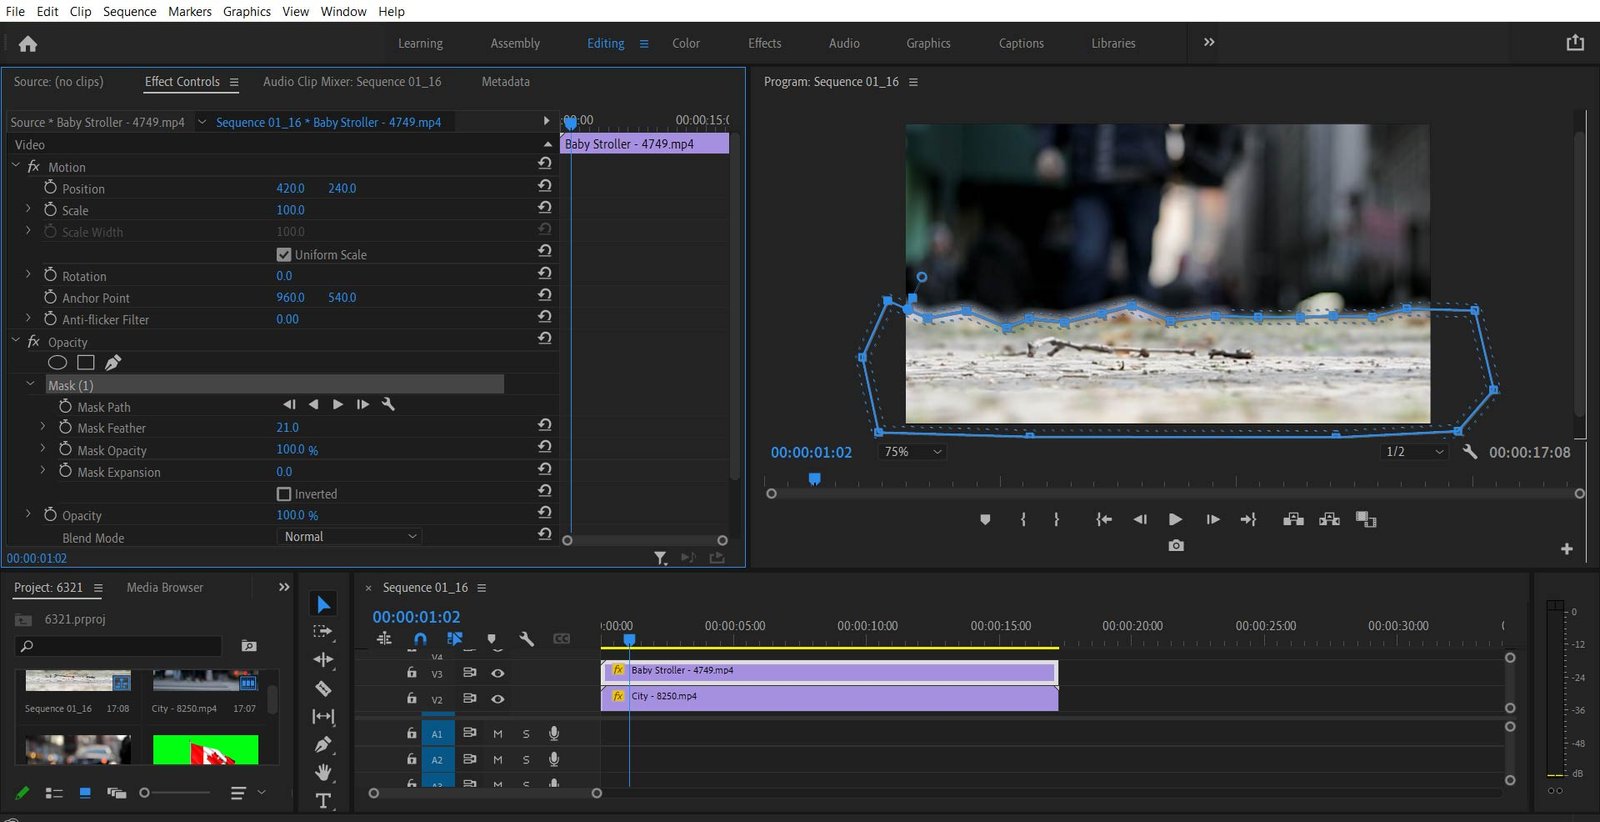
Place the clip which you want to appear inside your mask on Video Track 1 directly below your masked clip. You can now be able to see the footage in that area.
You can adjust the footage alignment and change its position with the x and y positions in the Motion tab in Effects Controls.
How to Replace Screen with mask in Premiere Pro
You have seen lots of videos where they are using masks and situations, where you need to replace screens for some of the corporate clients.
In some videos, the client asks for you to remove the screen of the smartphone and add his company logo or other information. You need After Effects for complex masking or moving object masking, where you need to Track the Motion of the object.
in that video, Robbie used a green screen for masking. Which can be helpful to remove the chroma key.
You can also Explore more Articles on Our Website Which can be useful to you.