To animate text in Premiere Pro 2022 you have to know about text effects and animation workspace, which is really important. You can master motion graphics workflow in Premiere Pro with these steps.
When Adobe added the new Essential Graphics panel into the Premiere Pro. They have provided a new and improved workflow from the previous title panels. Now you can do almost everything in this single panel only, where you can animate, apply pre-sets, and also you can design new templates.

How to Create Text Animation from Scratch
I will provide you step by step process of how you can animate text in Premiere Pro.
This Text animation has four graphic elements, we have created two rectangles, one text, and one mask. All are animated at different times to make it a smoother look.
How to Animate Text in Premiere Pro: Step-by-step Guide
1. How to Add Text in Premiere Pro
You can either go to Graphics workspace or you can enable Essential Graphics on your workspace, To enable it to go to Window > Essential Graphics. Just create your text with the Text Tool (T Shortcut). Just type what you want I will write my website’s name and I am going to select two fonts, one for grow and the second for edit. You can do it by selecting the layer and marking the text with which you want to change the font.
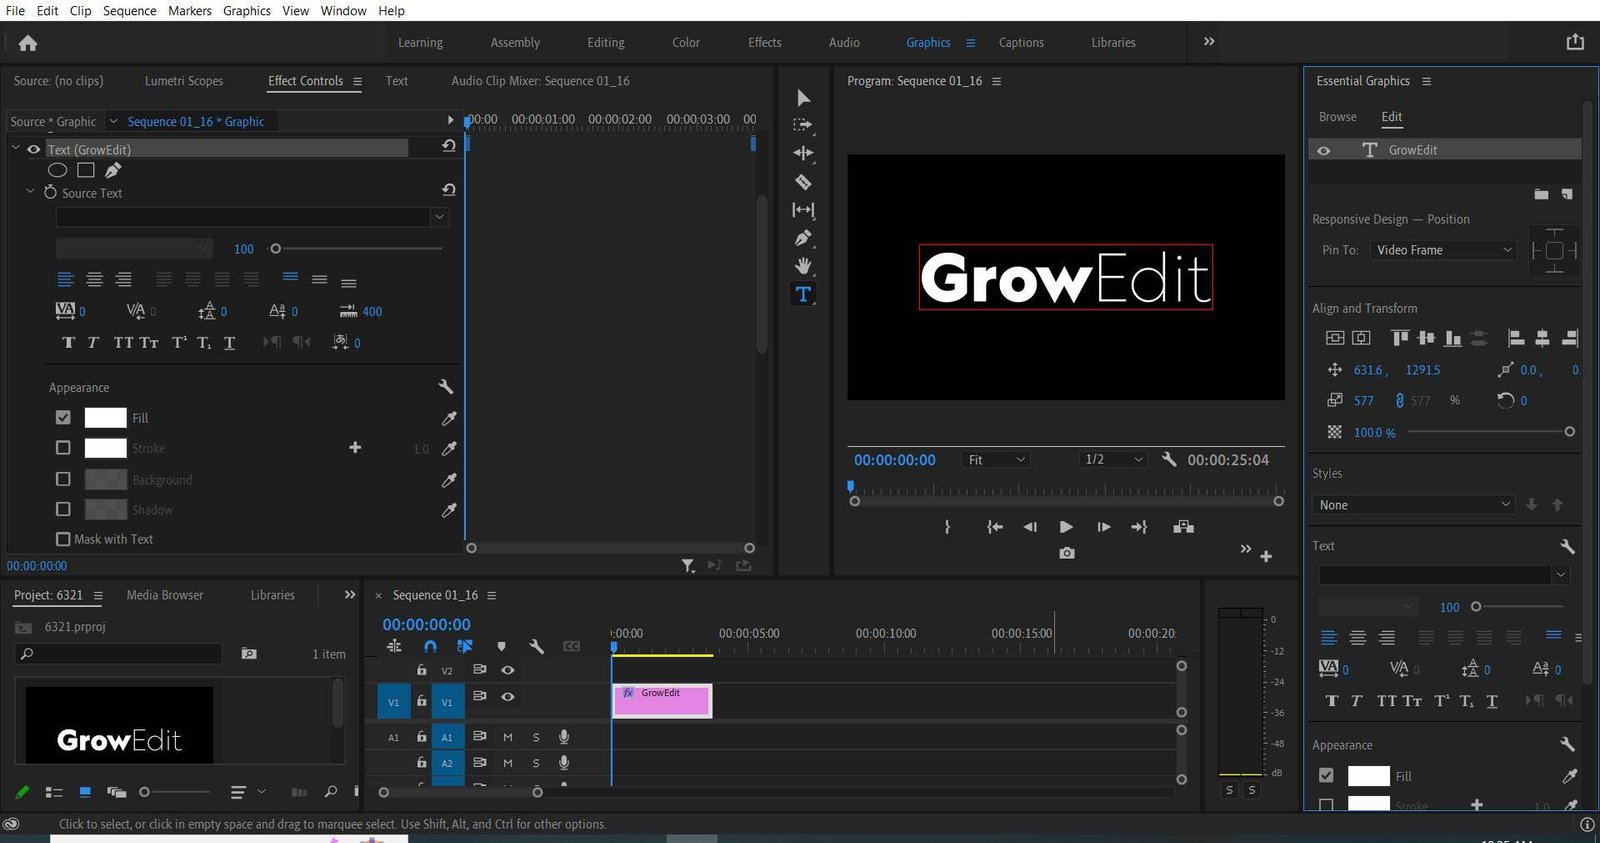
To align the text in the center I will use the tool Align and Transform. I will adjust the color under Appearance, you can also add a stroke, drop shadow, and background in the Appearance section.
2. How to Create a Text Background in Premiere Pro
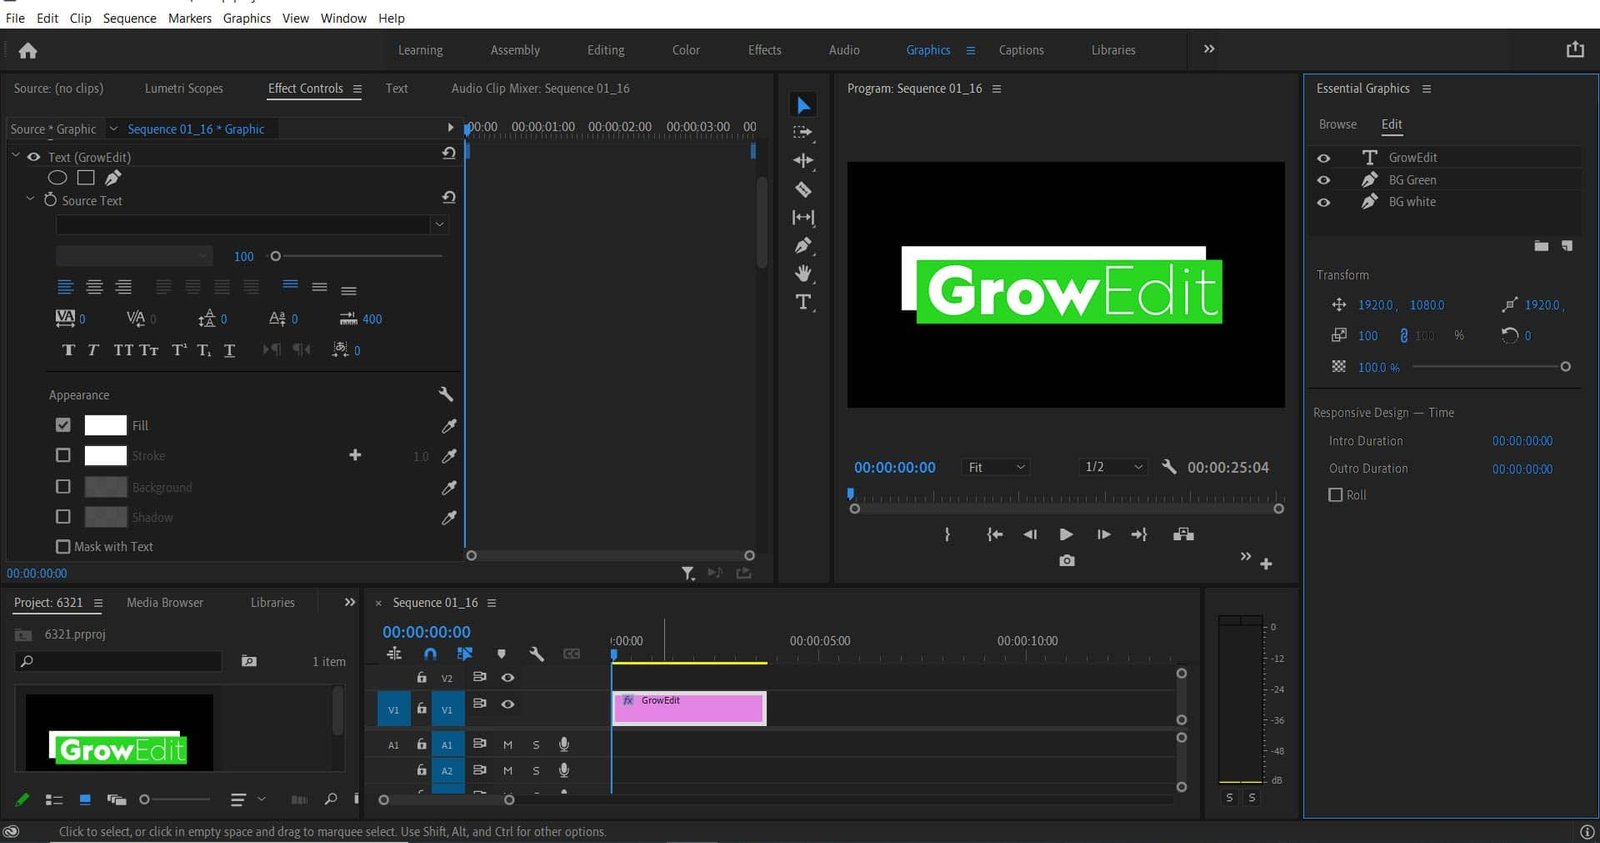
To add the background elements, I will create two new Rectangle layers. The New Layer button which is located at the top of the panel can add new layers. Just make the slightly bigger than the text. I will also add a mask to crop the extra part of the title. I am changing the color of each shape in the Fill in the Appearance section; I will make on background rectangle white and the second green.
Then I will align my layers, placing the white rectangle at the bottom, the green one above it, and the text will be at the top.
3. How to Mask the Graphic in Premiere Pro
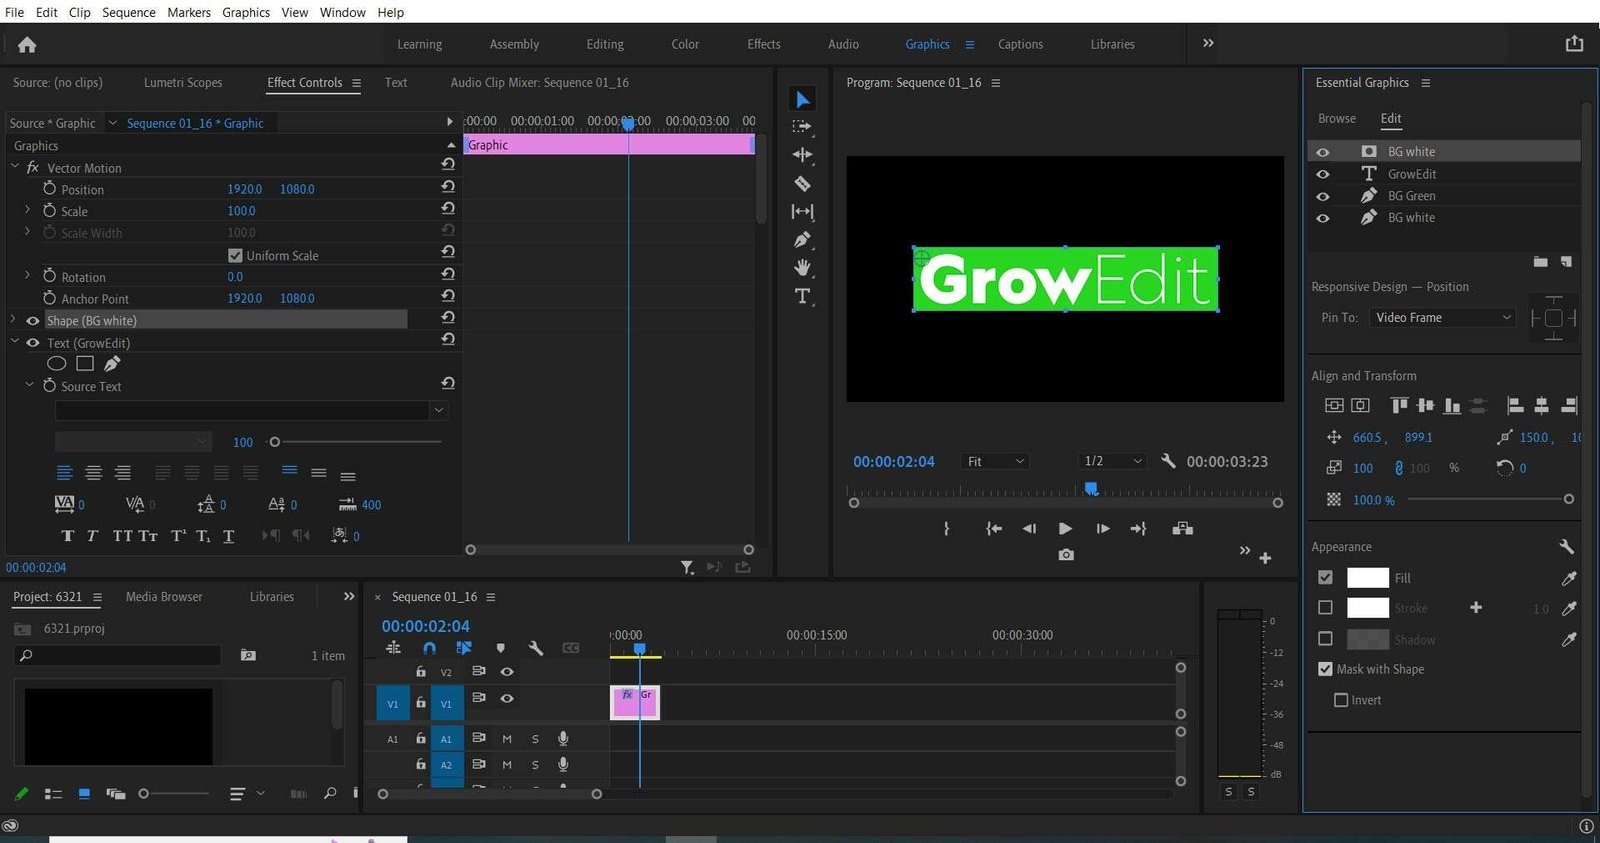
Essential Graphics can add a mask, which can be a transparent layer that only shows your files. Now how to animate text in premiere pro and how to mask a shape, First add a new rectangle shape layer. Then adjust the size and position, then select Mask with Shape option in the Appearance section.
If the mask layer is on top then It will apply to all the below layers. Then change the position of your layers according to the mask layer, you can also group layers when you are working on a big project, which will be a lot of complexes.
Now, let’s animate our elements and know how to Animate Text in Premiere Pro
4. How to animate text and background in Premiere Pro
Now we have added all elements in place, now we can make our title to life. You have already seen the text and the backgrounds have been animated by a simple Y Position shifting only.
You have to practice to get perfect results to animate the title. I will wait 0.25 seconds to appear the white background, then green will appear, and after that the text element.
Now first move the Playhead to the 0.25-second mark, and open your effects control panel. Tap on the stopwatch in the position it will add a keyframe in the white shape layer, now drag Playhead to start and change the Y position and take the white shape layer out of the mask. In my position setting the 1491 value will take out the shape layer.
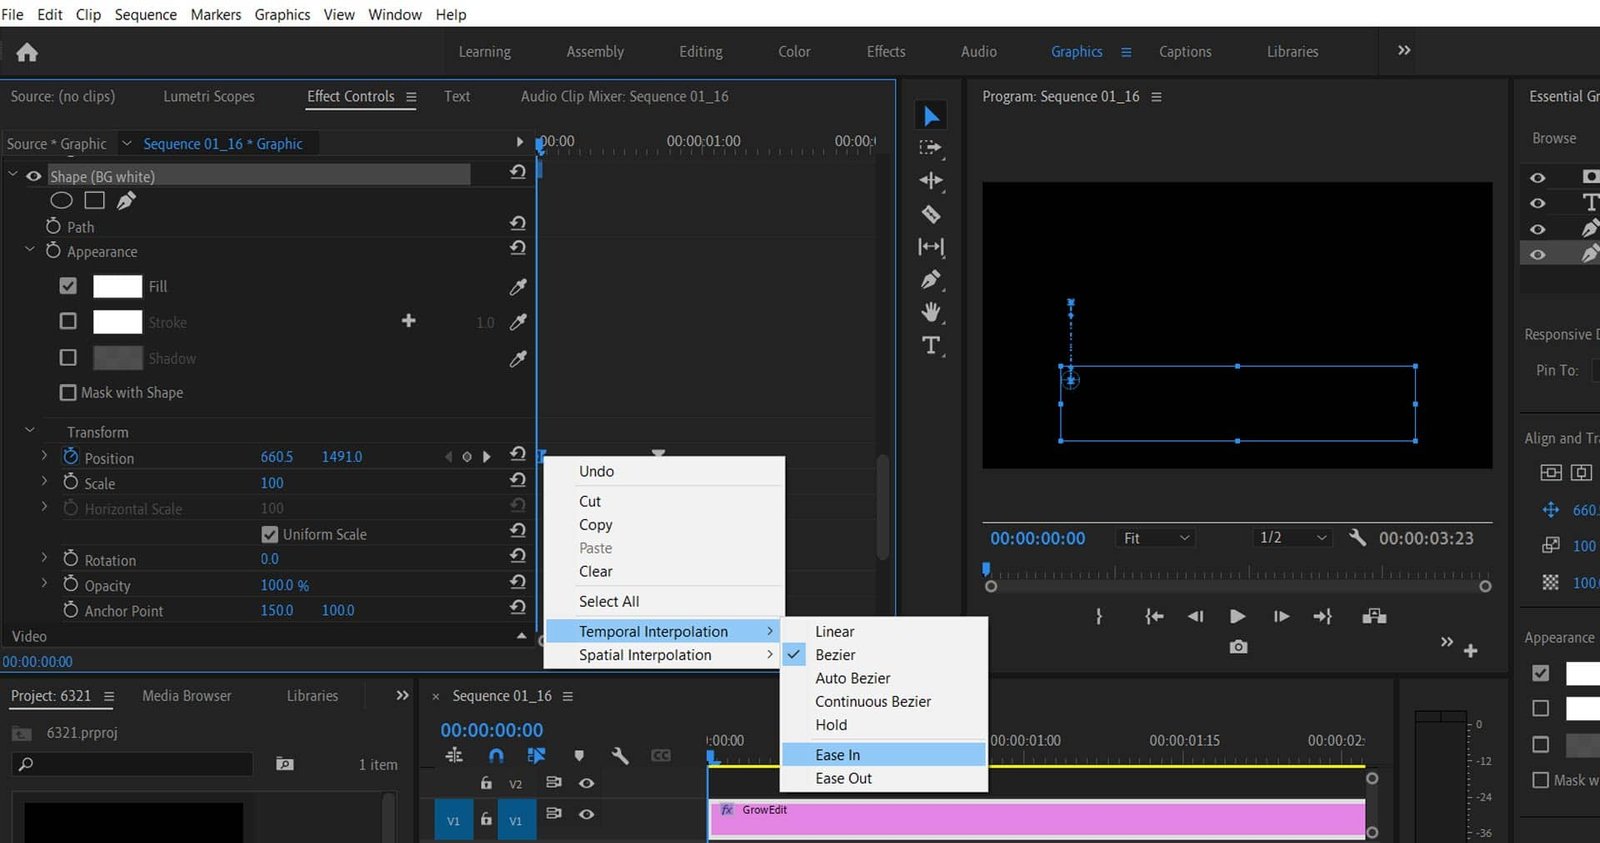
I am also adding Ease in and Ease Out in keyframes for smoother animation.
Now next add animation in green shape layer, Move your Playhead to 1.05 seconds and press the stopwatch button in position. Then drag back Playhead to 0.11 and change Y position to 1491. In text move, Playhead to 1.16 seconds and press the stopwatch to add keyframe position. Now drag back the Playhead to 0.22 and change the Y position 1491.
Note: You must add Ease in and Ease Out in keyframes for smoother animation.
You can also fine-tune the animation by pressing the drop-down button on the left side of the position. It’s a decent animation for me. You can make your text smoother by adjusting the in and out keyframes.
How to Use Motion Graphics Templates in Premiere Pro
You can also use Motion Graphics Templates in the Essential Graphics Panel. It uses the MOGRT files, which have been already made with animation. These MOGRT files can save lots of time. Some of the MOGRT files need After Effects. So make sure before downloading them to check the Requirements.