
Whether you are a beginner or a professional, you have heard about DaVinci Resolve green screen and chroma key. At some point, you have to use the chroma key, where you can remove the green screen and you can change the background or you can blend your overlays, etc.
The DaVinci Resolve has really advanced tools, which can work on green screen video. You don’t have to change your editing software and pay for expensive tools to remove the green screen.
Here you can learn simple steps to remove the green screen video and blend it with another video below it. First, you will know how to replace the green screen in a few seconds, and learn advanced techniques to blend it in as realistic a way as possible.
1. How to Edit in DaVinci Resolve Green Screen and Chroma Key
Here in DaVinci Resolve, you have to make a few steps to remove the DaVinci Resolve green screen. You can download any Green Screen footage from the web. I will use my own made green screen footage.
Step 1. How to Import Footage
When you are starting a project, first decide what you want to use and import it into DaVinci Resolve. You need two clips one clip with a green screen and the second one to replace the green screen.
- 1. Open the project panel in DaVinci Resolve, or you can start a new project.
- 2. You have to click on the Media Pool icon in the top left corner of your window.
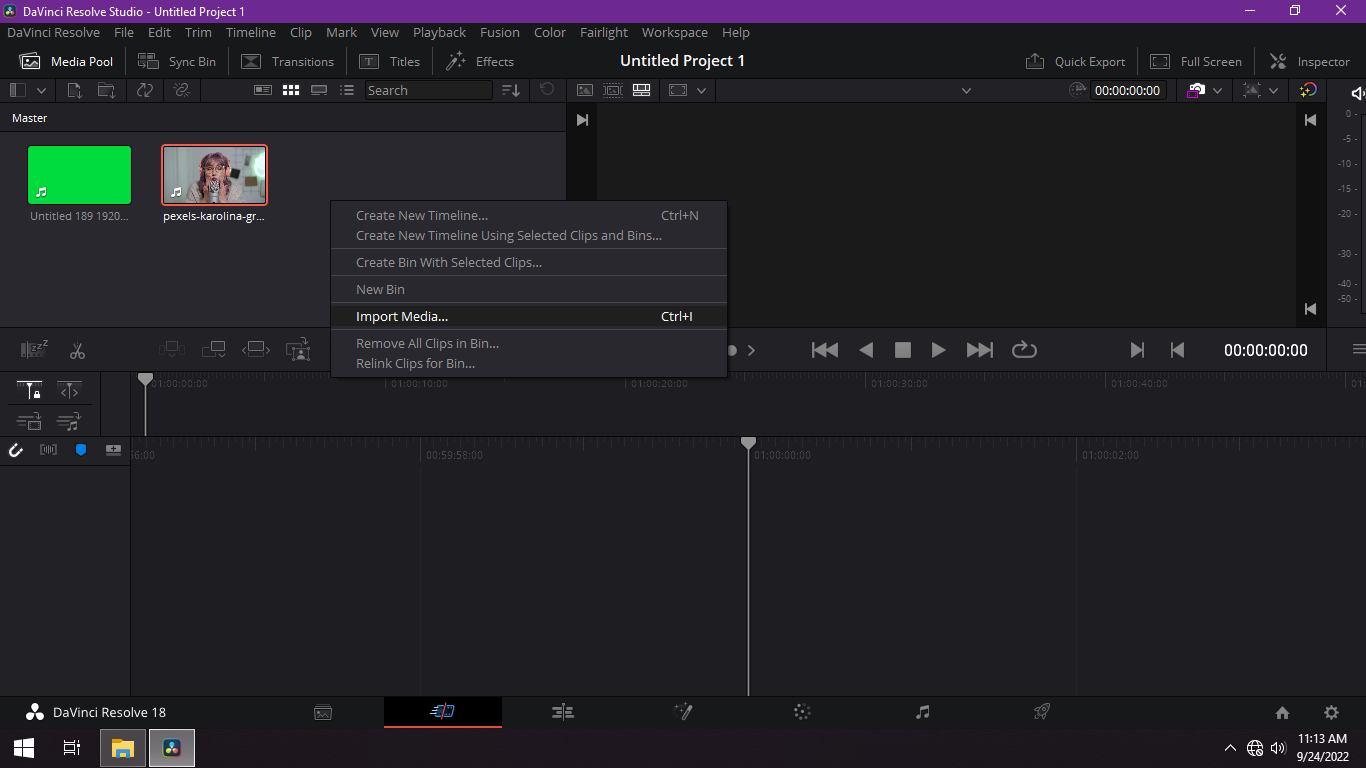
- 3. Now Right-click inside the Media Pool and Click on Import Footage.
- 4. Then select the clips which you want to import, and click Open.
- 5. You can also Drag it from your folder and Drop it into directly DaVinci Resolve.
Step 2. Now Set Up Your Timeline
You have to make sure that your timeline is correctly configured properly, so that will make it easier for you to remove the green screen and your below footage will be replaced by a transparent area.
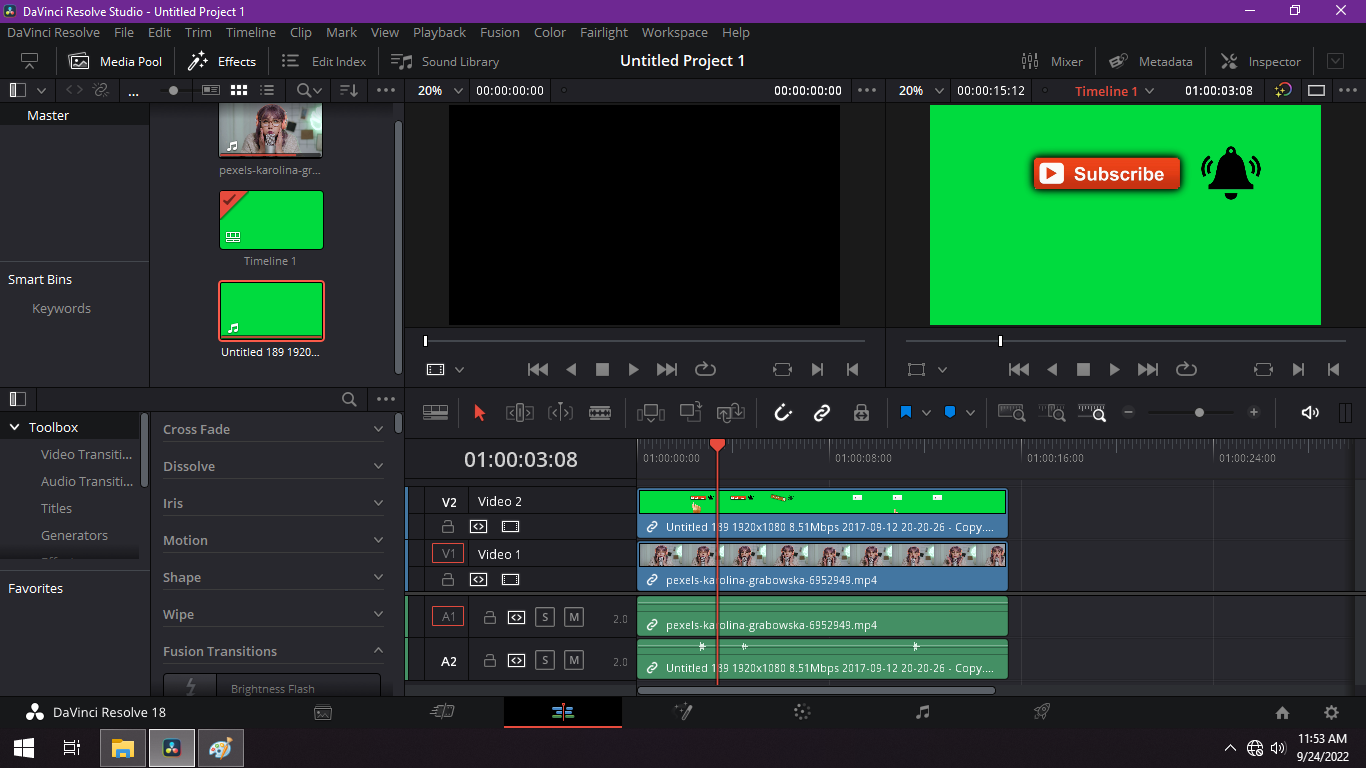
- 1. Drag your clips into the timeline of your screen. DaVinci Resolve will make a new sequence according to your clip specs.
- 2. You have to position the clips and put the green screen footage above the background footage. If you don’t see another video track simply drag your video on that empty space DaVinci Resolve will automatically make another track for you.
- 3. Match both clips on both tracks put green screen footage above another footage, and match both in points and endpoints.
Step 3 Chrome keying in DaVinci Resolve
Now you have set up your timeline, let’s start the process of DaVinci Resolve green screen removal.
- 1. Go to the color correction window by clicking on a color icon, which has been located at the bottom of the screen.
- 2. Now select the Qualifier tab.
- 3. You have to click on the Qualifier Tool now, which is underneath the heading Selection Range.
- 4. Drag your mouse and hover over the green screen area, and click. This will select the color which you want to isolate and you can make any other color transparent also.
- 5. Now view the area which you have selected to remove in gray by clicking on the highlight icon.
- 6. It’s selected the reverse colors, to correct that click on the Invert Selection icon it will reverse the gray area to make the green screen transparent.
Step 4. How to Use Alpha Channel in DaVinci Resolve
Now you have to blend the footage with the below footage for a realistic look.
- 1. Select the Nodes icon to view the Nodes workspace for which footage you have selected to remove the green screen in DaVinci Resolve.
- 2. The Nodes workspace might look complex for you, but you can use it easily. Just follow, in Nodes workspace, right click on blank are and select add alpha output. Now you will see a blue dot on the right of the window, which is the alpha output.
- 3. Now click and drag the small blue square and connect with another blue Node to draw a line to the Alpha Output icon. This will tell the node system to blend the green screen footage with whatever clip you are using below that clip.
- 4. Click on the Highlight icon again, and it will show you your new composite image.
- 5. Now you can reposition the layer or you can edit more to enhance it.
Watch the below video for Complete Blending Green Screen in DaVinci Resolve.