
Intro to After Effects Freeze Frame 2022 Edition
Here in this article, you will learn the After Effects Freeze Frame feature. As you know Adobe After Effects is a motion graphics, animation, and video editing software. It is the industry standard for filmmaking. So, we are going to learn the freeze-frame feature, where you will learn how to freeze your clip and after that we will apply some techniques to amazing effects.
Adobe After Effects Freeze Frame Video Tutorial
As you can see in the video, we are going to provide you step by step guide in this article.
After Effects Freeze Frame Step: 1.
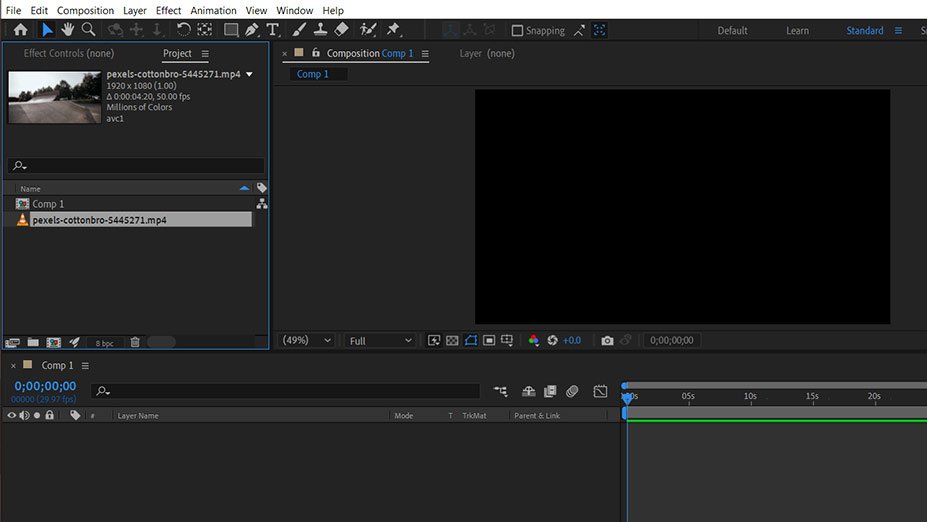
First, let’s check the interface before starting and get a better understanding of After Effects Freeze Frame. You will get a menu bar at the top where you will get File, Edit, Composition, etc. while every option has its submenu. Below that we will get the tools panel and properties. You can learn about more features in our Adobe After Effects Category.
Step 1
Now to start the After Effects Freeze Frame Process, we must make a New Project and Create a new Composition.
Step 2
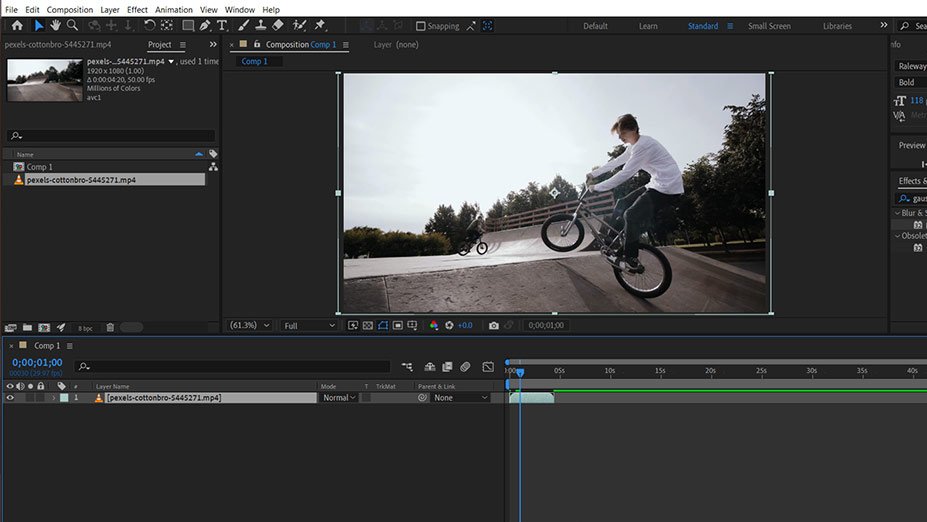
Add your video inside the Composition.
Step 3
Drag your clip into the timeline.
Step 4
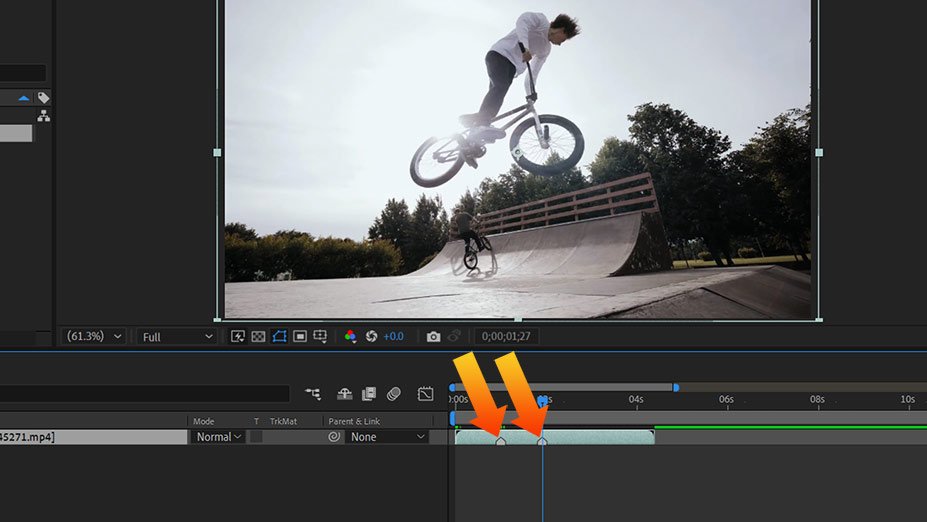
Let’s first find the area where you want to freeze the frame inside the clip. After finding the points you must add a marker for reference. Just go to Layer > Markers > Add Marker or you can use the keyboard shortcut * on Numpad to add a marker. I will mark some positions.
Step 5
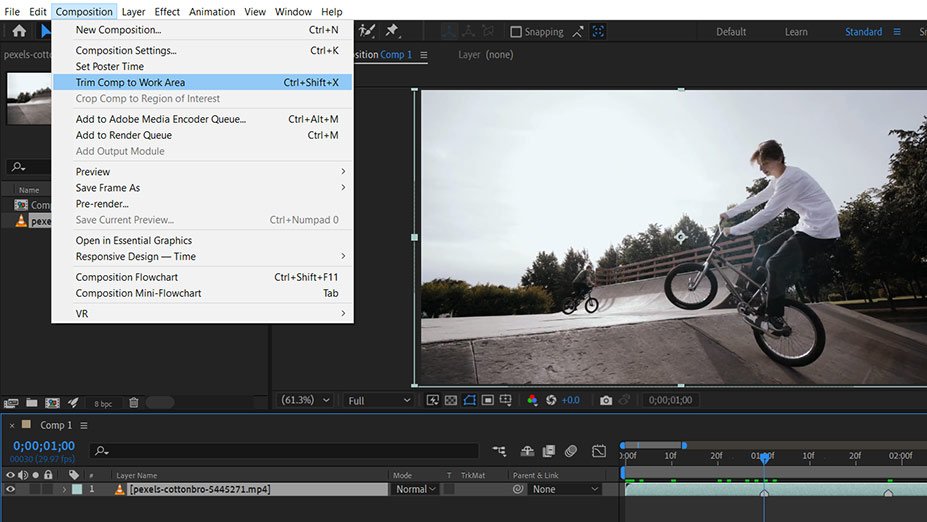
Now you must reduce the work area according to your clip. A smaller clip will not put a load on After Effects, otherwise, you will face lag issues in After Effects if you have low ram. To trim the area go to Composition > Trim Comp to the work area or you can use the keyboard shortcut CTRL + SHIFT + X to remove unused parts.
Step 6
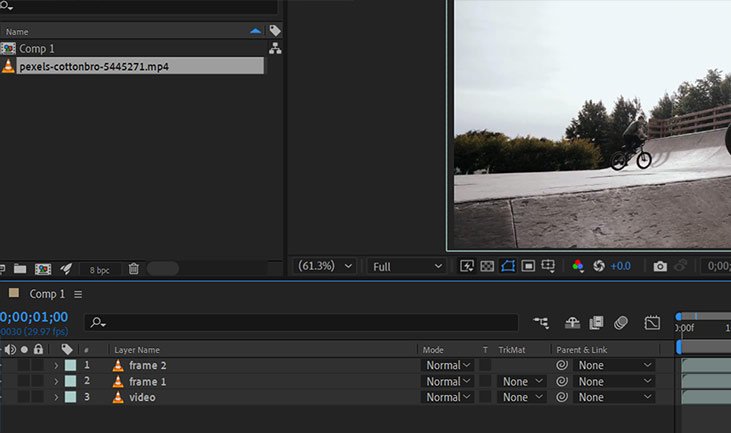
Now we have added two markers, and duplicate the video twice to use freeze frame After Effects. To do that go to Edit > Duplicate. Press CTRL + D and make two duplicates. Then Rename your clips to frame 1 and frame 2.
Step 7
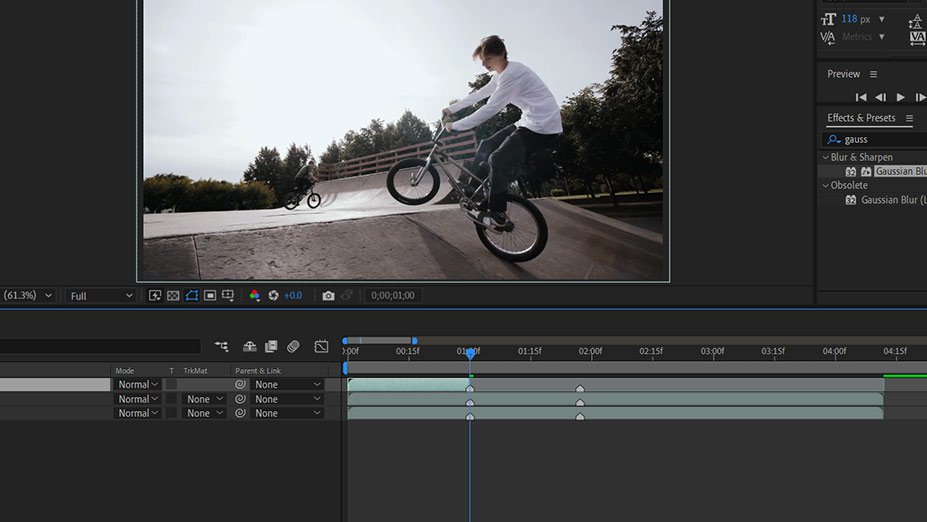
After duplicating go to the first layer, which is frame 2 upside and reduce its size to the first mark. To do that go to the ending of a frame and drag from the end of the clip to the first marker.
Step 8
Now in the second layer frame 1 reduce its size to the second marker.
Step 9
Drag the time indicator on the 1st marker. You can also use it easily by holding shift by doing that it will snap the indicator to the marker and keyframes. Let’s freeze now, to do that right click on frame 2 layer and then Time > Freeze Frame.

Step 10
Now a time remap property is added to the layer and does it similarly on the Frame 1 layer. Select the layer, then right-click and go to Time > Freeze Frame.
Step 11
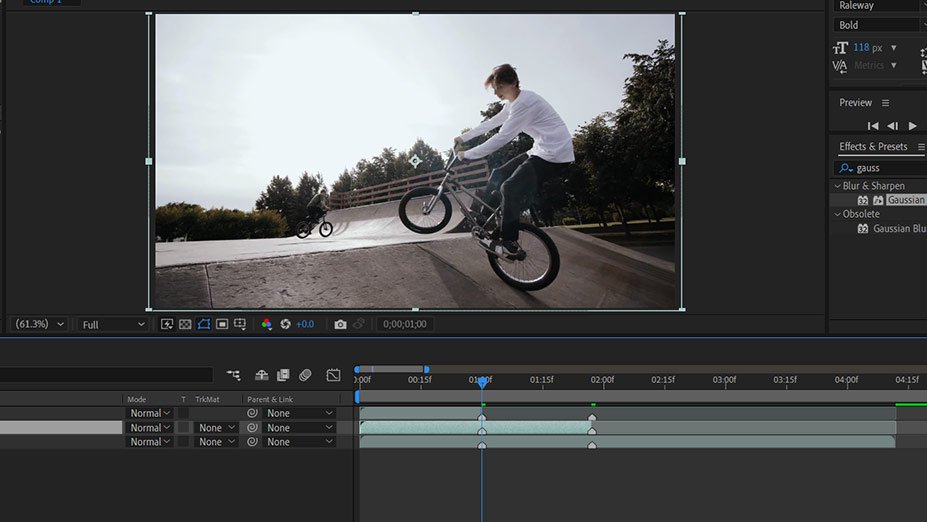
You can also change the marker label by right click to avoid confusion. Now to make the After Effects freeze frame effect, we must create a mask on freeze frame layers. It will only show the part which you want to freeze. To do that drag the time indicator before the frame 2 marker and use the pen tool or you can use keyboard shortcut G. if you want to expand the screen just double click on the name of the composition inside the composition panel. It will make the full-screen panel and you can easily mask the frame 2 layer.
Select Frame 2 layer before making a mask. Then create an outline of your object. You have to use a pen tool with some practice you will be able to mask the person or object.
Now do the same with frame 1 and move your time indicator between frame 2 and frame 1 marker. Then create a mask around the object. You must spend time making a precise mask.
After creating a mask on both select mask frame 1 drop-down menu. Then click on mask 1 and increase the feather to 5. It will remove the rough edges. Do it on the frame 2 layer also.

Now you have made After Effects Freeze Frame.