When is to video editing you are already familiar with the Transitions. In this tutorial, I will show you how to add transitions in DaVinci Resolve 18.
If you a video editor then you have already used software’s like Premiere Pro, Filmora, or Final Cut Pro. They have the prebuilt transitions pre-sets to choose from. DaVinci Resolve also has prebuilt transitions. You can create your transitions to an advanced level by changing some parameters.
DaVinci Resolve is one the best software in the video editing industry. It has been used by many color-grading specialists and motion graphic artists. This software provides the ability to make your videos to the next level.
This tool has professional video editing, visual effects, color grading, and audio mixing inside its free version.
The free version can be Downloaded from directly Blackmagic Design. It works on all major operating systems. You don’t have to worry about if you have a machine that runs on Windows, Linux, or macOS. It runs on these three major platforms.
1. How to Add Transitions in DaVinci Resolve
It’s really an easy method to add transitions in DaVinci Resolve. They have made it quite simple with the drag-and-drop option.
How to add a single transition in DaVinci Resolve
To add a transition in DaVinci Resolve 18:
- You have to check there is a cut between two clips
- Go to the Effects panel and Expand the Toolbox
- Click on Video Transitions
- Drag and drop your desired transition over the cut
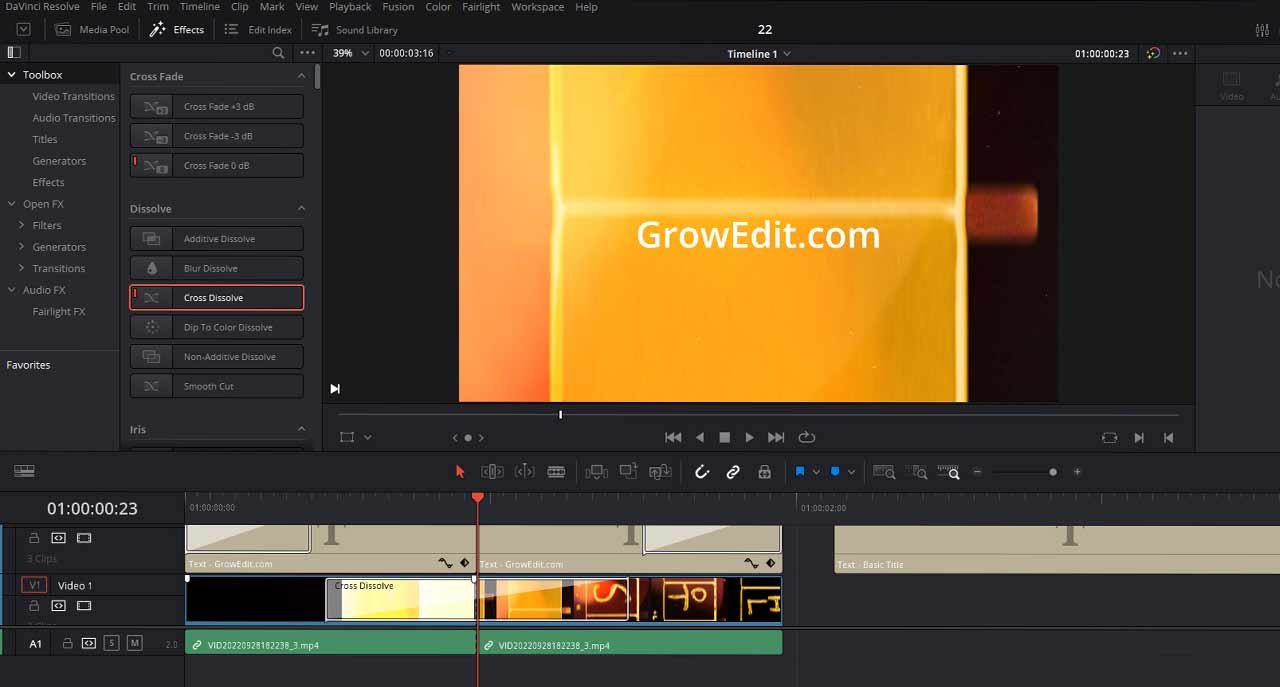
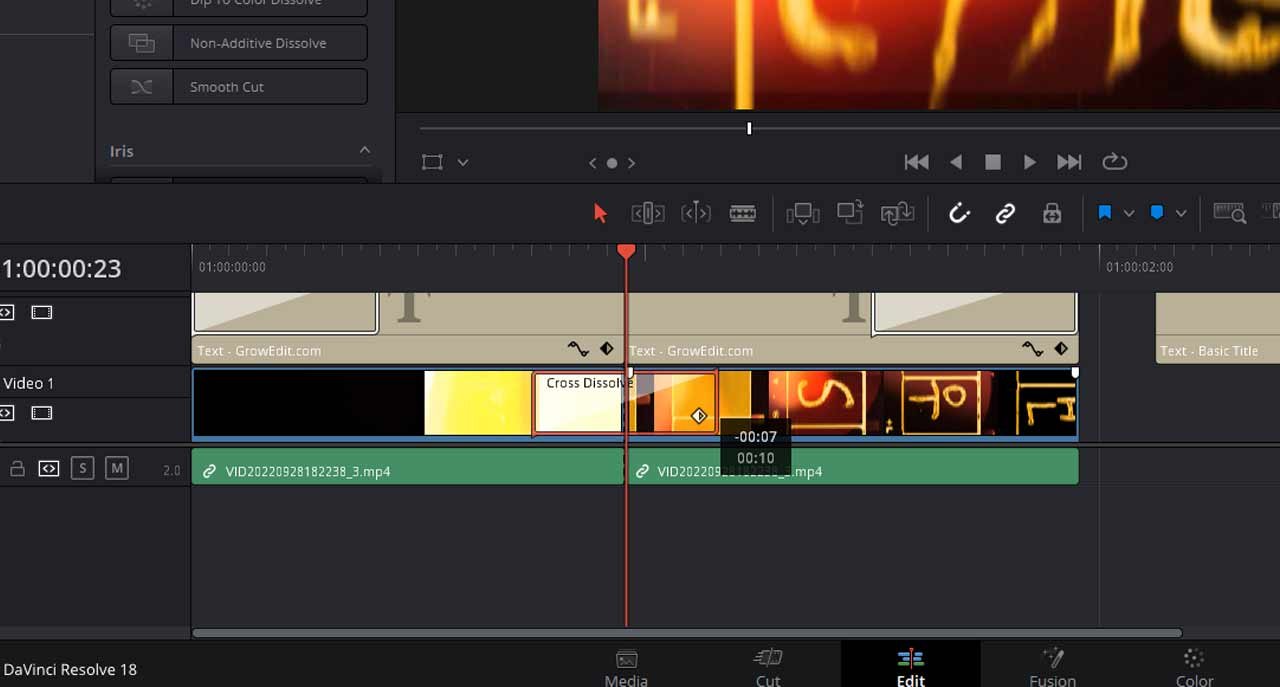
After adding the transition to your cut, you will notice a window in the upper right-side corner, where you can change the settings of transition and modify it like duration, Alignment, Style, Start ratio/end ratio, Ease, and transition curve.
You can also change the speed of transition by hovering the mouse on the transition ending and dragging it left or right to change its speed.
2. How to add multiple transitions in DaVinci Resolve at the same time
While using Resolve, you can add multiple transitions easily. Using this method can save you lots of time and avoid wasting time adding the same thing repeatedly. If you have a big project with 150 clips and 90% of clips require the transition, then think how much time it will take.
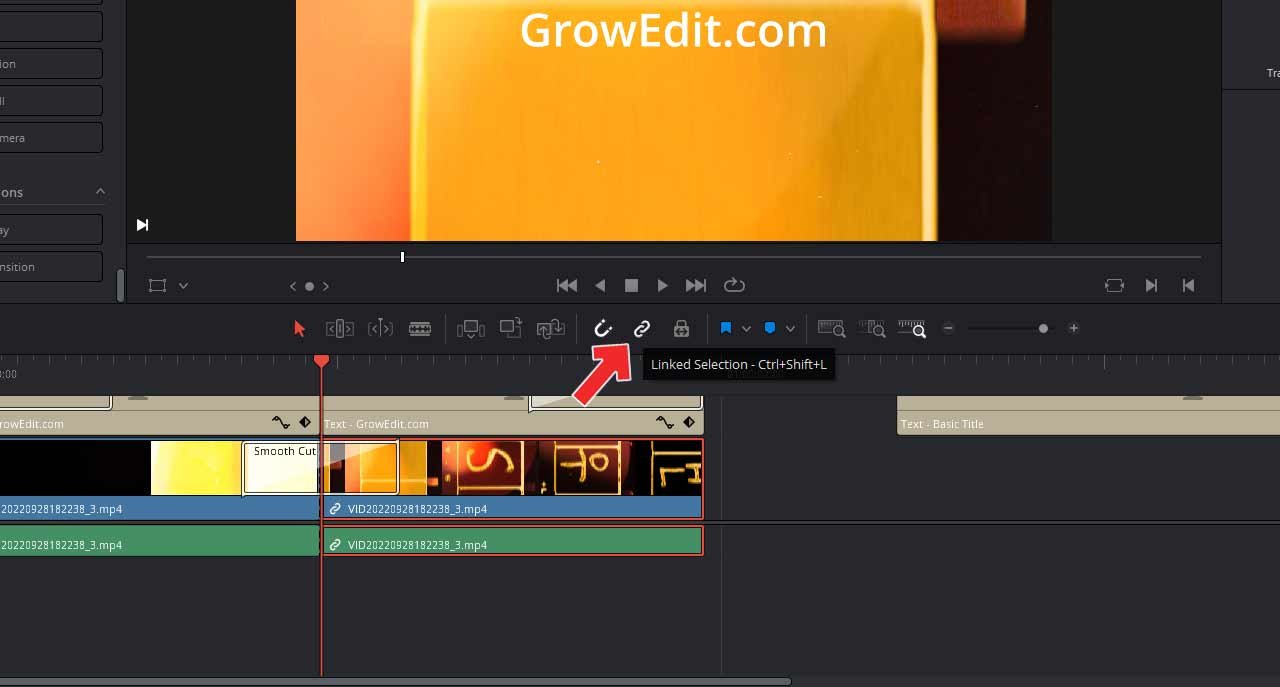
Step 1. Unlink the sound before adding the transition.
When you are about to add transitions in DaVinci Resolve, just make sure to unlink the sound from your videos. This is because some of the transitions will also apply to your sound, and it will sound horrible to listen.
To unlink the sound, first right-click on the clip and select Unlink. You can also use the Keyboard shortcut CTRL + Shift + L on windows and on macOS press CMD + Shift + L.
The third option is to click on the Link/unlink icon to Link or unlink your footage.
Step 2. Make your transition to default transition
In this process, you have to make your desired transition to default transition, which can be applied to your edit easily.
- Select your desired transition and right-click on it
- Now select Set As Standard Transition
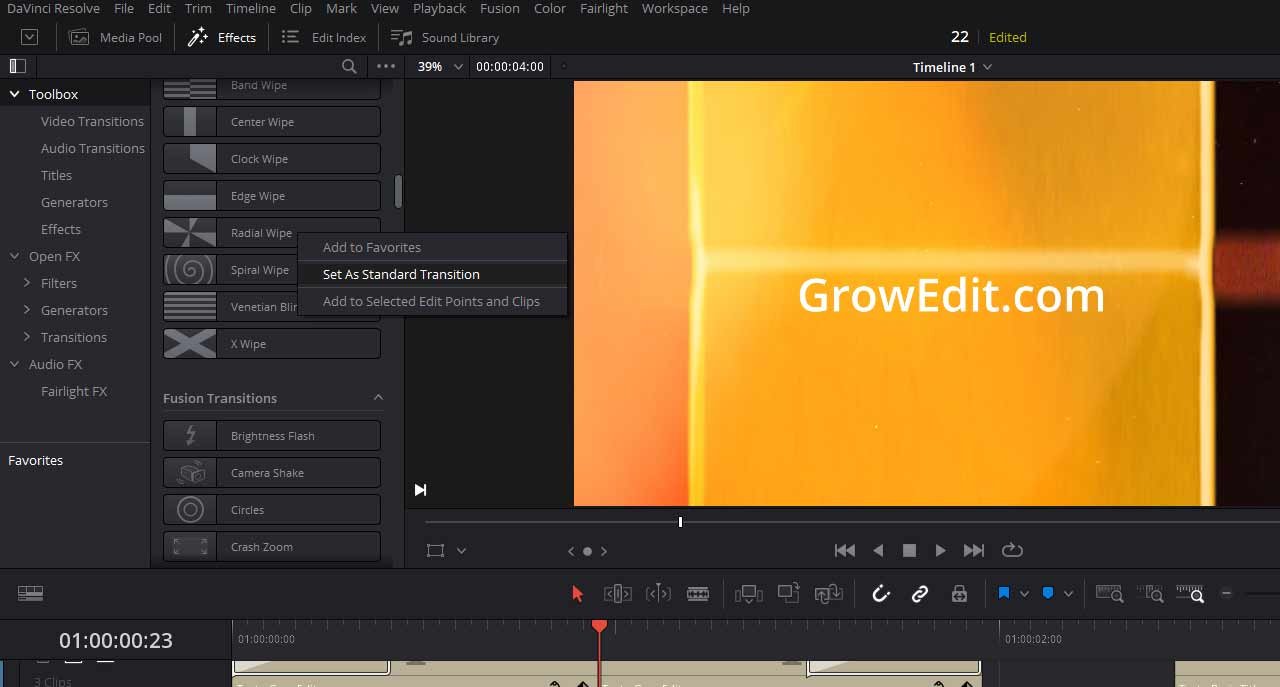
It will add a little red line on the selected transition, it tells you about the current default transition.
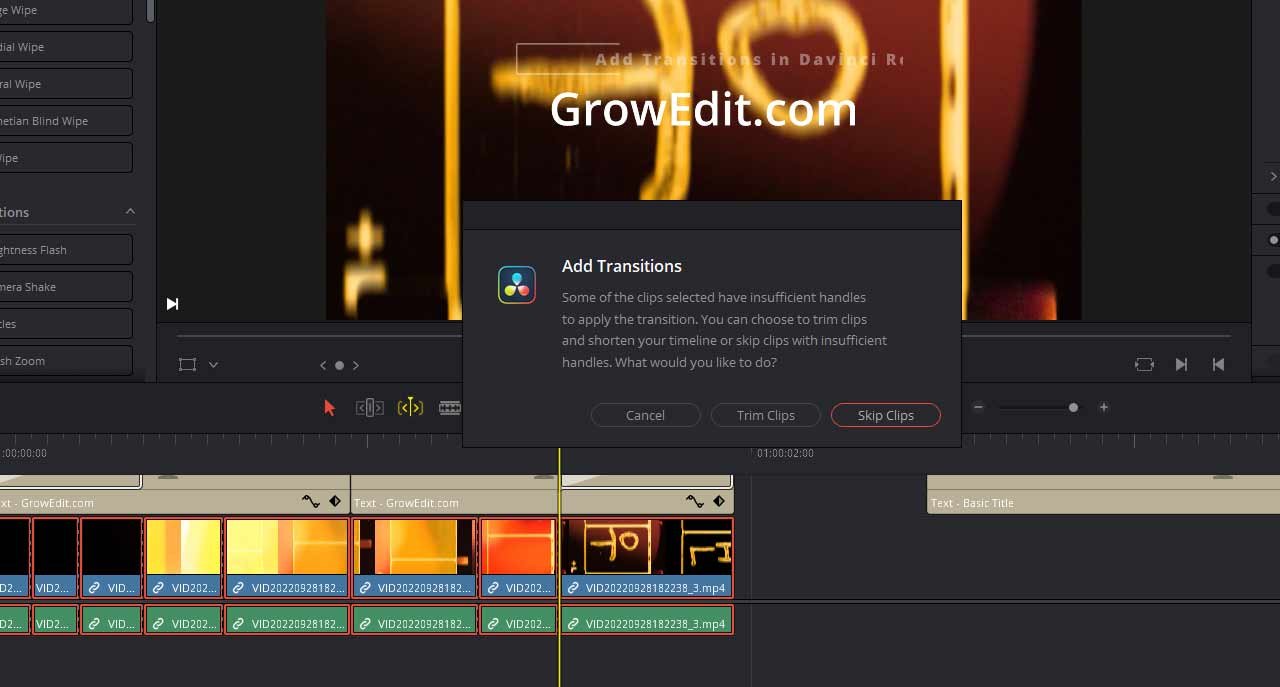
Step 3. Now add transition on all clips
To add multiple transitions in DaVinci Resolve, first, you have to select the clips to which you want to apply the default transition. After selecting just press CTRL + T on windows or CMD + T on macOS to apply the default transition.
After pressing CTRL + T a new popup window will appear that asks for Trim clips that don’t have sufficient handles to apply the transition. DaVinci Resolve can trim the videos for you if you want or you can skip those clips by clicking on skip clips.
System Requirements to add Transition in DaVinci Resolve
| Minimum Requirements | |
| Windows 10, Linux CentOS 7.3, macOS 11 Big Sur | |
| RAM | 16 GB of system memory (RAM). 32 GB for using Fusion |
| GPU | Integrated GPU or discrete GPU with at least 2 GB of VRAM |
| GPU which supports Open CL 1.2 or CUDA 11 | |
| AMD/NVIDIA/Intel Latest GPU Driver required by your GPU |
Conclusion
DaVinci Resolve is a complete video editing software, where you can make cinematic videos and for the transitions methods, you can use either one of these two methods to add a transition between two clips. You can also check out lots of transitions in the Effects panel.
There are lots of cool transitions, I liked the Glitch Transition.